To insert a table, right-click anywhere in your DC design and select .
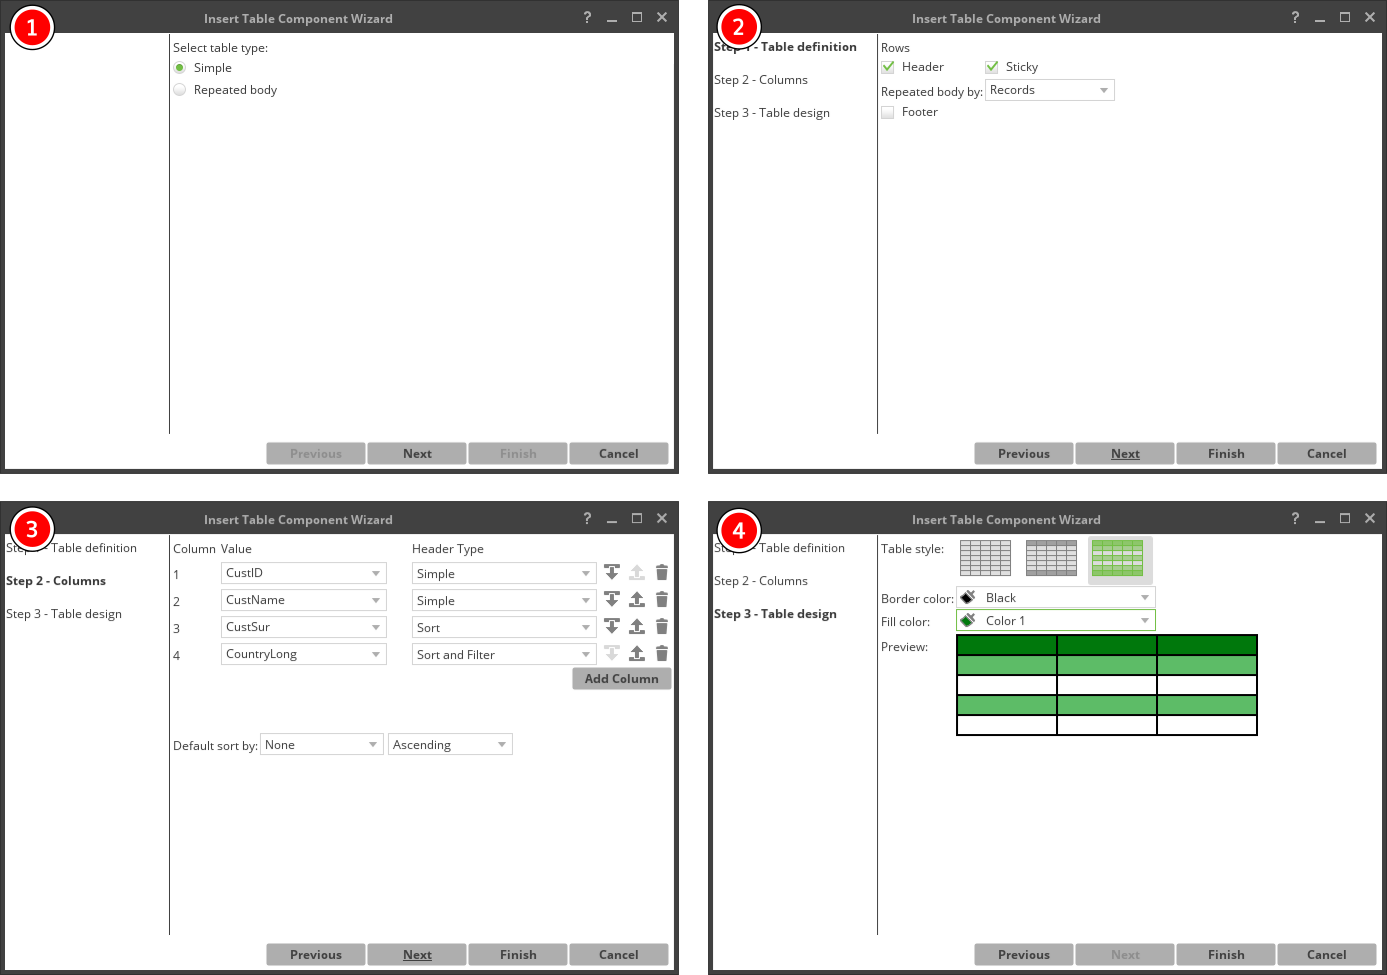
This dialog allows you to select either a simple, non-repeated table or a table with a repeated body.
In this dialog, you can specify the header/footer settings and a repeated array. Note that the array used in Data | Records by cannot be selected here.
In this dialog, you can specify the columns and their header types. For each column, you must either select one variable or simply clear its value (the column will contain a default value: ).
The last step allows you to style the table.
You can navigate between the steps by clicking on the Next and Preview buttons. Clicking on the step numbers in the upper-left corner is not available.
All of the settings specified via the dialogs can also be achieved manually through the created table's Properties, Subcomponents, Frames, and Data Mapping tabs.
See the detailed description of every step in the next slides.